
How to Measure Noise Levels in Your Home Before Soundproofing
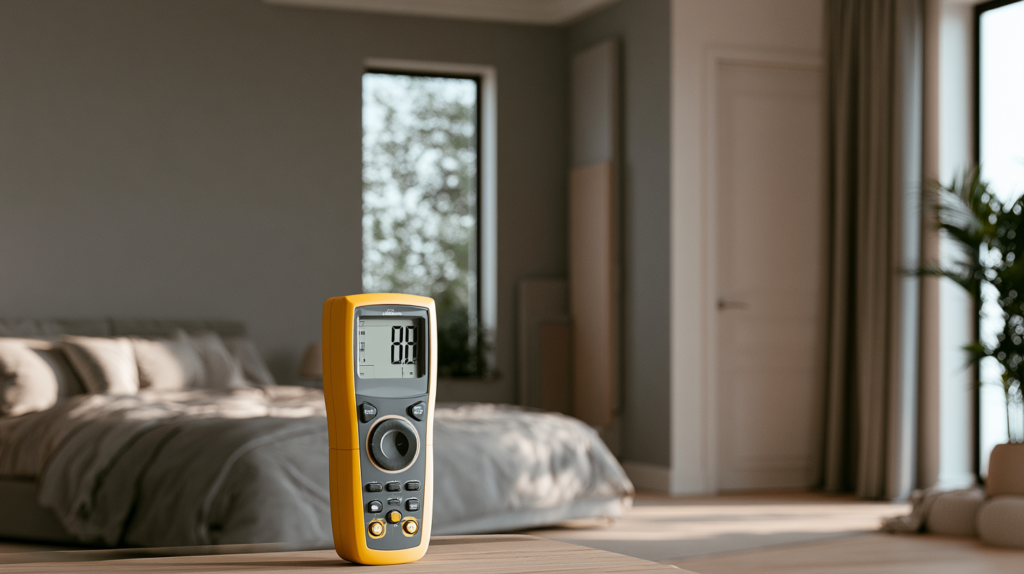
Spending money on soundproofing without measuring the noise first is guesswork. You might underestimate the problem and treat the wrong wall, or overspend on heavy-duty solutions the room never needed. Either way, you’re working blind. The smart order is simple: get the numbers first, then choose the fix.
That’s the whole point of taking an acoustic measure before you renovate. A baseline reading shows you how much noise you’re dealing with and where it’s coming in, turning a vague “the house is too loud” into concrete data you can actually build a plan around.
This guide covers why measuring first matters, what the decibel numbers mean, which tools and methods to use, where and when to take readings, how to turn the results into a plan, and when it’s worth calling in a professional.
Why Measure Before You Soundproof
The basic principle is that you can’t fix what you can’t measure. A reading removes the guesswork and tells you exactly what you’re up against before you commit any money.
Without data, people fall into one of two traps. Some underestimate the problem and apply a half-measure that barely helps. Others overestimate it and pay for far more treatment than the space required.
A baseline reading also gives you a reference point. Once the soundproofing is done, you can measure again and confirm whether it actually worked — something you can’t do if you never recorded the “before.”
Just as important, measuring shows you the priority. Noise rarely enters evenly; one surface usually leaks far more than the rest, and the numbers tell you which one to tackle first.
Understanding Decibels and What the Numbers Mean
Before you take any readings, it helps to know what the numbers represent. Sound is measured in decibels (dB) on a logarithmic scale, which behaves differently from how you might expect.
Because the scale is logarithmic, an increase of about 10 dB sounds roughly twice as loud to the human ear — not 10% louder. Small-looking jumps in the numbers can mean big differences in perceived loudness.
For rough orientation, a quiet bedroom sits at the low end of the scale, normal conversation in the middle, and busy city traffic considerably higher. The exact figures matter less than understanding where your readings fall relative to those everyday points.
Loudness isn’t the whole story, though. Frequency matters too — a low rumble and a high-pitched voice pass through walls and windows differently, so knowing what kind of sound dominates is as useful as knowing how loud it is.
Airborne vs. Impact Noise — Measure the Right Problem
Not all noise travels the same way, and measuring without knowing the type leads to the wrong fix. There are two main categories, and they call for different solutions.
Airborne noise — voices, TV, music — travels through the air and passes through walls, windows, and gaps. This is the noise most people think of first.
Impact noise — footsteps from above, thumps, banging — travels as vibration through the building’s structure rather than through the air. It’s a different problem with different fixes.
There’s also a complication: flanking paths. Sound sneaks around a wall through outlets, gaps behind baseboards, and shared ducts. If you don’t account for them, your readings can point you at the wrong surface entirely.
How to Measure Home Noise — Tools & Methods
The tool you choose depends on how precise you need to be, and the options range from free to professional-grade. Higher stakes justify better instruments.
Smartphone sound-level apps
A phone app is the easiest starting point and fine for a rough sense of how loud a room is. Just be honest about the limits — phone microphones aren’t calibrated for accuracy, so treat the numbers as ballpark figures, not gospel.
Dedicated sound level meters
A standalone meter is a big step up in accuracy and repeatability. For most home projects, it gives readings consistent enough to compare between rooms and to trust when planning where to spend.
Professional acoustic testing
At the top end, professionals use Type 1 sound level meters, spectrum analyzers, and data logging that records noise over time. This is the level you want when the decisions are expensive or the accuracy really matters.
The general rule: the higher the stakes — a major renovation, a dispute with a neighbor — the more the precision of the instrument matters.
Where and When to Take Your Measurements
Where and when you measure changes the results as much as what you measure with. A single reading in the middle of a room tells you very little.
For location, measure at each surface separately — near the windows, the walls, the ceiling, and the doors. This is how you find the main entry point for the noise instead of guessing. Take readings at several spots in the room, not just one.
Timing matters just as much. Measure at different times of day — peak traffic, an evening when neighbors are active, late at night — because a one-off reading can be misleading.
Test under different conditions, too: windows open versus closed, HVAC on versus off. Comparing these tells you how much each factor is contributing, which is often surprising.
Turning Measurements Into a Soundproofing Plan
Once you have readings, the goal is to convert them into priorities rather than treating everything equally. Start with the loudest path — and it’s frequently the windows, not the walls, that leak the most.
The frequency profile guides the type of solution. A dominant low rumble points toward adding mass; airborne leaks through gaps point toward sealing. Matching the fix to what the data shows is what keeps you from wasting money.
Resist the urge to spread your budget evenly across the whole room. Concentrating on the biggest source gives a far better result per dollar than a thin layer of treatment everywhere.
And set a realistic target. The aim is a meaningful reduction to a comfortable level, not absolute silence — which is rarely achievable anyway.
Verifying the Results — Measure Again After
Measuring again after the work is how you prove it paid off. Repeat the readings at the same spots, under the same conditions, and compare them to your baseline.
This does two things. It confirms the soundproofing worked, and it reveals any weak points that remain — the spots that still need attention.
Without a before-and-after comparison, you’re left judging by feel, and feelings are unreliable here. It’s easy to convince yourself an expensive project helped when the numbers might tell a more honest story.
Common Mistakes When Measuring Home Noise
Most measurement errors are easy to avoid once you know them. Watch for these:
- Taking a single reading in one spot. One measurement can’t show where noise is entering or how it varies.
- Judging by ear alone. Perception is unreliable; a meter gives you something to compare.
- Trusting an uncalibrated app as fact. Phone apps are fine for rough estimates, not final decisions.
- Ignoring frequency. Knowing only the volume, not the type of sound, leads to the wrong fix.
- Overlooking flanking paths. Outlets and gaps can make a quiet-looking wall the actual leak.
- Confusing airborne and impact noise. They’re measured and treated differently.
- Expecting total silence. A realistic reduction is the goal, not zero noise.
When to Bring in a Professional
For a basic project, you can absolutely do this yourself: grab a meter or an app, take readings at each surface, at different times, and use them to decide where to focus. That’s enough for many homes.
Some situations call for more precision. A major renovation, a stubborn noise problem you can’t pin down, documentation for a dispute with a neighbor, or a detailed frequency breakdown all benefit from professional-grade testing rather than a rough reading.
That’s when it makes sense to bring in specialists. Firms like New York Soundproofing run acoustic testing with calibrated equipment, take readings at multiple points and at different times, provide a frequency analysis, and verify the results before and after — turning “the house is too loud” into an actual plan. If you’re about to spend real money on soundproofing, getting an accurate picture of the noise first is the step that makes everything after it more effective.
About The Author

 How to Plan Whole-House Cabinetry for a Renovation or New Build
  Reasons Why My AC Might Be Blowing Warm Air
  Window Replacement in Calgary: Cost Guide & Energy-Efficient Options for Alberta Winters