
How to Seal Drafty Windows and Doors Like a Pro
Cold air slipping under a door. A faint whistle near a window frame on a windy night. Small clues like these usually mean your home is losing heat and wasting money at the same time. The good news is that sealing drafty windows and doors is one of the most affordable home improvements you can make, and it does not require specialist tools or professional experience. Most homeowners can get it done in a single afternoon.
Why Drafts Cost More Than You Think
Air leaks are common in homes of every age. Materials expand and contract as temperatures change through the seasons. Caulk dries out, shrinks, and cracks. Door frames shift slightly over time. All of that creates small gaps, and those gaps make it harder for your home to stay comfortable.
Poorly sealed windows and doors can account for a meaningful share of a household’s yearly heating and cooling costs. Of all the air leaks in a home, gaps around window frames tend to stand out because they sit at body height. You feel that moving air right away when you walk past.
Keeping household expenses under control has become a priority for many people, and that goes beyond utility bills. Dutch consumers, in particular, have become more aware of the places where money quietly slips away each month. For people who also spend time on online entertainment platforms, keeping track of accounts and commitments matters just as much. The Dutch gaming registry system, for example, gives players more control over their activity, and information on how to handle “cruks eerder opzeggen” is available for those who want a clearer understanding of their options. In the same way that sealing a draft stops hidden energy loss, managing digital commitments can prevent unnoticed spending from piling up over time.
Choosing the Right Materials
Before you start, it helps to know the difference between caulk and weatherstripping, because each one does a different job.
Caulk is best for stationary gaps, such as the spaces around window frames, between the frame and the wall, or along baseboards near exterior walls. It creates a more permanent seal and comes in silicone, latex, and acrylic formulas. Silicone caulk is usually the most durable option for exterior use, while paintable latex versions are a practical choice indoors.
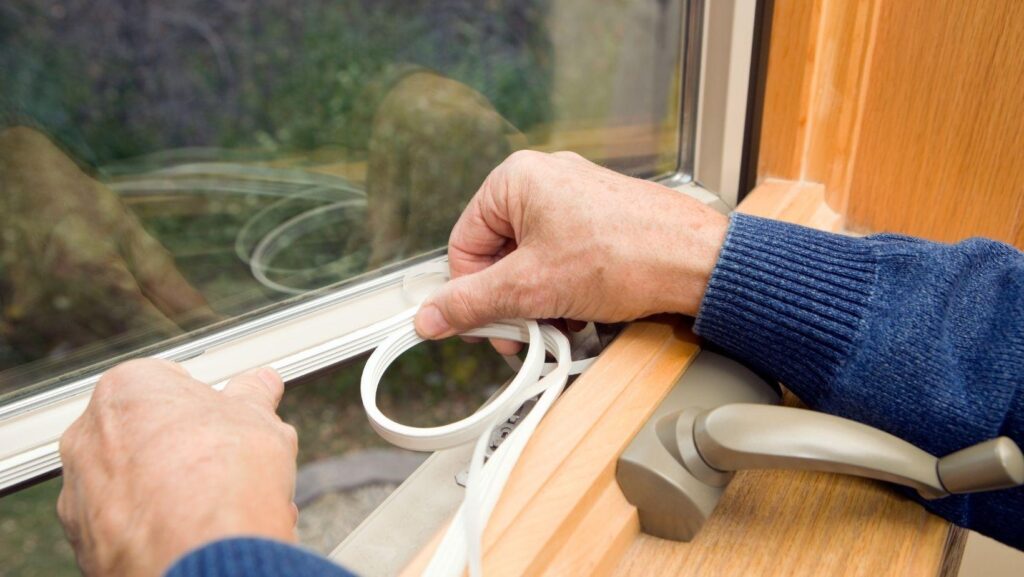
Weatherstripping is made for moving parts, including doors and windows that open and close regularly. It compresses when the door or window shuts, which creates a tight seal, and then springs back when opened. Common types include:
- Foam tape (affordable, easy to install, best for low-traffic areas)
- V-strip or tension seal (durable, suitable for the sides of doors and double-hung windows)
- Door sweeps (fitted along the bottom of exterior doors to block floor-level drafts)
- Rubber or silicone gaskets (long-lasting and effective for high-traffic doors)
Step-by-Step Sealing Process
- Step 1: Locate the leaks. On a windy day, hold a lit incense stick or a thin strip of tissue near window edges and door frames. If it moves, air is getting through. Check the corners especially carefully, since gaps are often widest there.
- Step 2: Clean the surfaces. Remove any old, crumbling caulk with a putty knife or caulk remover tool. Wipe the area with a damp cloth, then let it dry fully before you apply anything new.
- Step 3: Apply caulk to stationary gaps. Cut the caulk tube at a 45-degree angle and run a steady bead along the gap. Smooth it with a damp finger or a caulk tool. Work in manageable sections and try not to stop halfway through a line, since that can leave the seal uneven.
- Step 4: Install weatherstripping on moving parts. Measure each section carefully before cutting. Peel-and-stick foam tape is the easiest option for beginners, but adhesive-backed V-strip usually lasts longer. For the bottom of an exterior door, a door sweep screwed into place gives the most dependable seal.
- Step 5: Test the results. Close the windows and doors, then repeat the tissue or incense test. If the seal is doing its job, you should not see any movement.
When considering the overall cost, the entire project typically costs less than $50 in materials which makes it one of the best-value maintenance tasks a homeowner can take on.
Maintenance and Long-Term Value
Caulk and weatherstripping do not last forever. Silicone caulk can hold up for 10 to 20 years, while foam weatherstripping may need to be replaced every two to five years, depending on traffic and climate. A quick inspection each autumn, before heating season starts, helps keep seals in good shape and stops energy loss from creeping back in.
Knowing when patching is worthwhile versus when full replacement makes more financial sense is a useful way to think about almost any home maintenance job, including window and door sealing. In many cases, a few dollars spent on caulk can extend the useful life of an existing window for years.
If you are considering bigger projects, it also helps to review what skills are needed for safe DIY home repairs before getting started. That gives homeowners a better sense of what they can handle themselves and when it is smarter to call in a professional.
Sealing drafty windows and doors is a small task, but the impact is easy to notice. The materials are inexpensive, the process is straightforward, and the savings often show up on the very next energy bill.
 How to Measure Noise Levels in Your Home Before Soundproofing
  Elements That Make a Home Look Worn Down When It’s Well-Maintained
  Rapid Home Direct: How This Online Mortgage Hub Simplifies Home Financing In 2026