
The Aussie Home Repair Kit: 8 Fixes You Can Do in Under Five Minutes
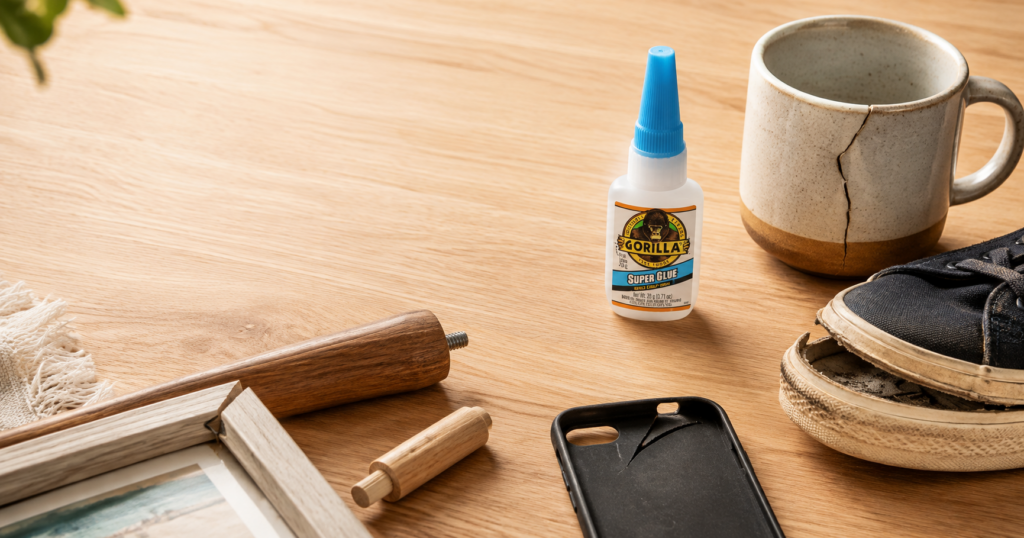
Half the little disasters in an Aussie home don’t need a tradie, a trip to Bunnings, or even a full Saturday. They need five minutes, a steady hand, and the right glue already sitting in the kitchen drawer. Keep a tube of a fast-setting cyanoacrylate super glue on hand and you can knock over most of these before the kettle’s finished boiling. Here are eight repairs worth doing the moment you notice them, before a small crack turns into a bigger one.
1. Reglue a wobbly chair leg
That chair that’s been rocking for months? The joint has dried out and the old glue has given up. Pull the leg free if it moves easily, scrape off the crusty old glue with a blade, then run a thin bead around the dowel and press it straight back in. Wipe off any squeeze-out immediately, sit the chair upright on all four legs so it sets true, and leave it alone for the rest of the day. Don’t clamp it hard, you’ll just push the glue straight back out.
2. Fix a broken mug handle
Ceramic breaks clean, which makes it one of the easiest five-minute jobs going. Dry-fit the pieces first so you know exactly how they sit, because once the glue grabs you’ve got seconds, not minutes, to adjust. Apply a small dot to one edge only, press the two halves together firmly for about thirty seconds, and hold under light pressure rather than letting it rest on its own. Skip the two-part epoxy for a simple handle snap, it’s overkill and takes far longer to cure than the job needs.
3. Reattach a loose shoe sole
A flapping sole on your work boots or sneakers is annoying, not fatal, and you don’t need a cobbler for it. Peel the loose section back as far as it’ll comfortably go, brush out any grit or old adhesive, and apply glue to both the sole and the upper rather than just one side. Press together and hold firm for a full minute, since rubber and fabric need more contact pressure than smooth plastic does. Leave the shoe flat overnight before wearing it again if you can manage it.
4. Patch a cracked phone case
A hairline crack in a hard plastic case will spread if you ignore it, so it’s worth catching early. Clean the crack with a dry cloth first to remove dust and skin oils, since glue won’t bond well to a greasy surface. Run a thin line along the crack from the inside where possible, squeeze the edges together, and hold for thirty seconds. It won’t be invisible, but it’ll stop the crack travelling any further across the case.
5. Stick down a lifted skirting board corner
Skirting boards lift at the corners when the original adhesive or nail gives way, usually from humidity or just age. Push the loose section back against the wall to see how far it’s actually pulled away, then apply glue along the back edge in a zigzag rather than one thick line. Press it firmly into place and prop it with something heavy for a couple of minutes while it grabs. This won’t fix a badly warped board, but for a corner that’s simply come loose, it’s a genuinely lasting fix.
6. Repair a broken toy
Snapped plastic toys are a near-daily occurrence in a house with kids, and most breaks are a clean plastic-to-plastic join. Match the broken edges together first to check nothing’s missing, apply a small amount of glue to one side, and press the pieces together for about twenty seconds. Hold the toy itself still rather than gripping the joint while it cures, because small hands come back to test it faster than you’d expect. Once it’s dry, that joint is often stronger than the rest of the toy.
7. Tighten a loose cabinet handle
A cabinet handle that spins on its screw usually means the hole underneath has worn out, not that the screw needs replacing. Remove the handle, add a couple of drops of glue into the screw hole itself, then reinsert the screw and tighten as normal before the glue sets. The glue fills the worn threads and gives the screw something to grip again. Give it a minute before you hang anything off it, and don’t overtighten while it’s still curing or you’ll strip it straight back out.
8. Fix a split thong strap
That satisfying moment your thong strap pulls through the sole halfway through summer is entirely fixable, if you get to it before the hole tears any wider. Push the strap plug back through from underneath, apply a small amount of glue around the plug where it meets the sole, and press down firmly for thirty seconds. Stand it on a flat surface rather than wearing it while it cures. It’s not a permanent fix if the rubber’s perished, but for a strap that’s simply worked loose, it’ll get you through the rest of the season.
None of these fixes need a toolbox full of gear or a tutorial longer than the repair itself. What they do need is doing the job properly rather than rushing it, because a glued joint that’s dusty, greasy, or under-pressed will fail again within a week. Keep a decent super glue somewhere you’ll actually find it, in the kitchen drawer or the laundry cupboard rather than buried out in the shed, and you’ll knock these little jobs over the moment you spot them instead of living with them for another six months. That’s really the whole trick: catching small breaks early, and having the right glue within arm’s reach when you do.
About The Author

 Itzhak Ezratti on Building Communities That Last: A Founder’s Philosophy on
Long-Term Development
Itzhak Ezratti on Building Communities That Last: A Founder’s Philosophy on
Long-Term Development  Why Spartanburg Homeowners Keep Getting the Same Drain Clog and What It Could Mean
  Why Mobility Matters in the Kitchen